Docker 快速部署 Golang 1.12 开发环境 代码热更新

Synopsis: 如果你不想看如何使用 Docker 和 reflex 实现 Golang 源代码热更新并自动重新编译、运行的原理,可以直接跳到本文的章节 2 如何快速使用
1. 原理解析
1.1 构建包含 reflex 的镜像
你需要先安装 Docker-CE,可参考: http://www.madmalls.com/blog/post/visualizing-docker-containers-and-images/#1-docker
然后,克隆我放在 Github 上的项目:
[root@CentOS ~]# git clone https://github.com/wangy8961/go-docker-dev.git
[root@CentOS ~]# cd go-docker-dev/
如何实现
Golang代码热更新?
我们会使用 reflex 来监测以 .go 结尾的源代码或 go.mod(用于包管理器 Go Modules)的变化,一旦这些文件内容改变了,reflex 就会调用我们给它指定的配置文件 reflex.conf 中的指令 sh -c /usr/src/build.sh(即执行此脚本)
build.sh 脚本的作用就是切换到 容器内 Golang 源代码所在目录(比如 /app),然后进行编译并运行:
#!/bin/bash

cd /app
# 编译,GO_BUILD_FLAGS 是可选的环境变量值
go build -o app ${GO_BUILD_FLAGS}
# 运行,APP_RUN_FLAGS 是可选的环境变量值
./app ${APP_RUN_FLAGS}
现在,我们创建将会运行 reflex -c /usr/src/reflex.conf 的 Docker 基础镜像的 Dockerfile:
FROM golang:1.12.5-stretch

# 设置代理,因为后续 go get github.com/cespare/reflex 会下载依赖 golang.org/x/sys/unix 等
ENV HTTP_PROXY='socks5://127.0.0.1:1080'
ENV HTTPS_PROXY='socks5://127.0.0.1:1080'
# 安装 reflex 包
RUN go get github.com/cespare/reflex
# 复制 reflex 的配置文件到容器中的根目录下
COPY reflex.conf /usr/src
COPY build.sh /usr/src
# 设置容器内的工作目录,用于 RUN, CMD, ENTRYPOINT, COPY, ADD 等指令
WORKDIR /app
# 容器启动时,运行 reflex -c /usr/src/reflex.conf
# 由于工作目录已切换到 /app,所以 reflex 会监控 /app 目录下的 .go 或 go.mod 文件的变化
ENTRYPOINT ["reflex", "-c", "/usr/src/reflex.conf"]
注意: 后续构建此镜像时下载 Go 依赖包,需要科学上网,可参考: http://www.madmalls.com/blog/post/build-shadowsocks-server-on-centos/#33-linux-client 。我的 Docker 宿主机安装了 Shadowsocks 客户端,并使用 1080 端口,然后我们可以构建此镜像了,需要指定 --network host 更改网络模式(默认是 bridge 模式):
[root@CentOS go-docker-dev]# docker build --network host -t go-docker-dev:latest .
Sending build context to Docker daemon  75.26kB
Step 1/8 : FROM golang:1.12.5-stretch
 ---> 7ced090ee82e
Step 2/8 : ENV HTTP_PROXY='socks5://127.0.0.1:1080'
 ---> Running in 253791251a63
Removing intermediate container 253791251a63
 ---> c786afb6d6db
Step 3/8 : ENV HTTPS_PROXY='socks5://127.0.0.1:1080'
 ---> Running in cfca59a05f33
Removing intermediate container cfca59a05f33
 ---> 6aef3386ba42
Step 4/8 : RUN go get github.com/cespare/reflex
 ---> Running in fe62a278b71c
Removing intermediate container fe62a278b71c
 ---> 0719584291f8
Step 5/8 : COPY reflex.conf /usr/src
 ---> ab3a4f0441e9
Step 6/8 : COPY build.sh /usr/src
 ---> 9fd7880705d3
Step 7/8 : WORKDIR /app
 ---> Running in 505b279617b5
Removing intermediate container 505b279617b5
 ---> 5e36e28a80b5
Step 8/8 : ENTRYPOINT ["reflex", "-c", "/usr/src/reflex.conf"]
 ---> Running in dab2661248e8
Removing intermediate container dab2661248e8
 ---> 4b966b116294
Successfully built 4b966b116294
Successfully tagged go-docker-dev:latest
1.2 新建 Golang 项目
建议你将 Golang 升级到 1.12,可以支持 Go Modules 进行包管理,非常简单好用。假设你现在要开发一个新项目,名称为 go-example
[root@CentOS go-docker-dev]# mkdir go-example
[root@CentOS go-docker-dev]# cd go-example/
[root@CentOS go-example]# go mod init go-example
go: creating new go.mod: module go-example
[root@CentOS go-example]# cat go.mod
module go-example

go 1.12
现在,用你的 IDE 编译器打开此项目,比如我使用 VSCode。我们用官方模块 net/http 包来搭建一个简单的 HTTP 服务器,新建 go-docker-dev/go-example/main.go 文件:
package main

import (
    "flag"
    "fmt"
    "log"
    "net/http"
)

func main() {
    port := flag.Int("port", 50051, "the port to serve on")
    flag.Parse()

    http.HandleFunc("/", func(w http.ResponseWriter, r *http.Request) {
        fmt.Fprintf(w, "Hello, you've requested: %s\n", r.URL.Path)
    })

    err := http.ListenAndServe(fmt.Sprintf(":%d", *port), nil)
    if err != nil {
        log.Fatalf("failed to listen: %v", err)
    }
    fmt.Printf("server listening on port: %v\n", fmt.Sprintf(":%d", *port))
}
注意,可以通过命令行参数为 HTTP 服务器指定要监听的端口(默认为 50051),比如 -port 80
启动容器:
[root@CentOS go-docker-dev]# docker run -d \
  --name go-example \
  -e "APP_RUN_FLAGS=-port 80" \
  -p 80:80 \
  --rm \
  -v $PWD/go-example:/app \
  go-docker-dev:latest

b78cfaf9eac6147ca9cf6c84eb2355057a1d1323a086b2a3fd987495e44edc63

[root@CentOS go-docker-dev]# docker ps
CONTAINER ID        IMAGE                  COMMAND                  CREATED             STATUS              PORTS                NAMES
b78cfaf9eac6        go-docker-dev:latest   "reflex -c /usr/src/…"   4 seconds ago       Up 3 seconds        0.0.0.0:80->80/tcp   go-example
你可以进去容器内部看看它启动了哪些进程:
[root@CentOS go-docker-dev]# docker exec -it go-example /bin/bash
root@b78cfaf9eac6:/app# ps -ef
UID        PID  PPID  C STIME TTY          TIME CMD
root         1     0  0 06:48 ?        00:00:00 reflex -c /usr/src/reflex.conf
root        17     1  0 06:48 pts/0    00:00:00 sh -c /usr/src/build.sh
root        18    17  0 06:48 pts/0    00:00:00 /bin/bash /usr/src/build.sh
root       125    18  0 06:48 pts/0    00:00:00 ./app -port 80  # 我们通过环境变量和 build.sh 来指定命令行参数
root       131     0  4 06:51 pts/1    00:00:00 /bin/bash
root       138   131  0 06:51 pts/1    00:00:00 ps -ef
root@b78cfaf9eac6:/app# exit
exit
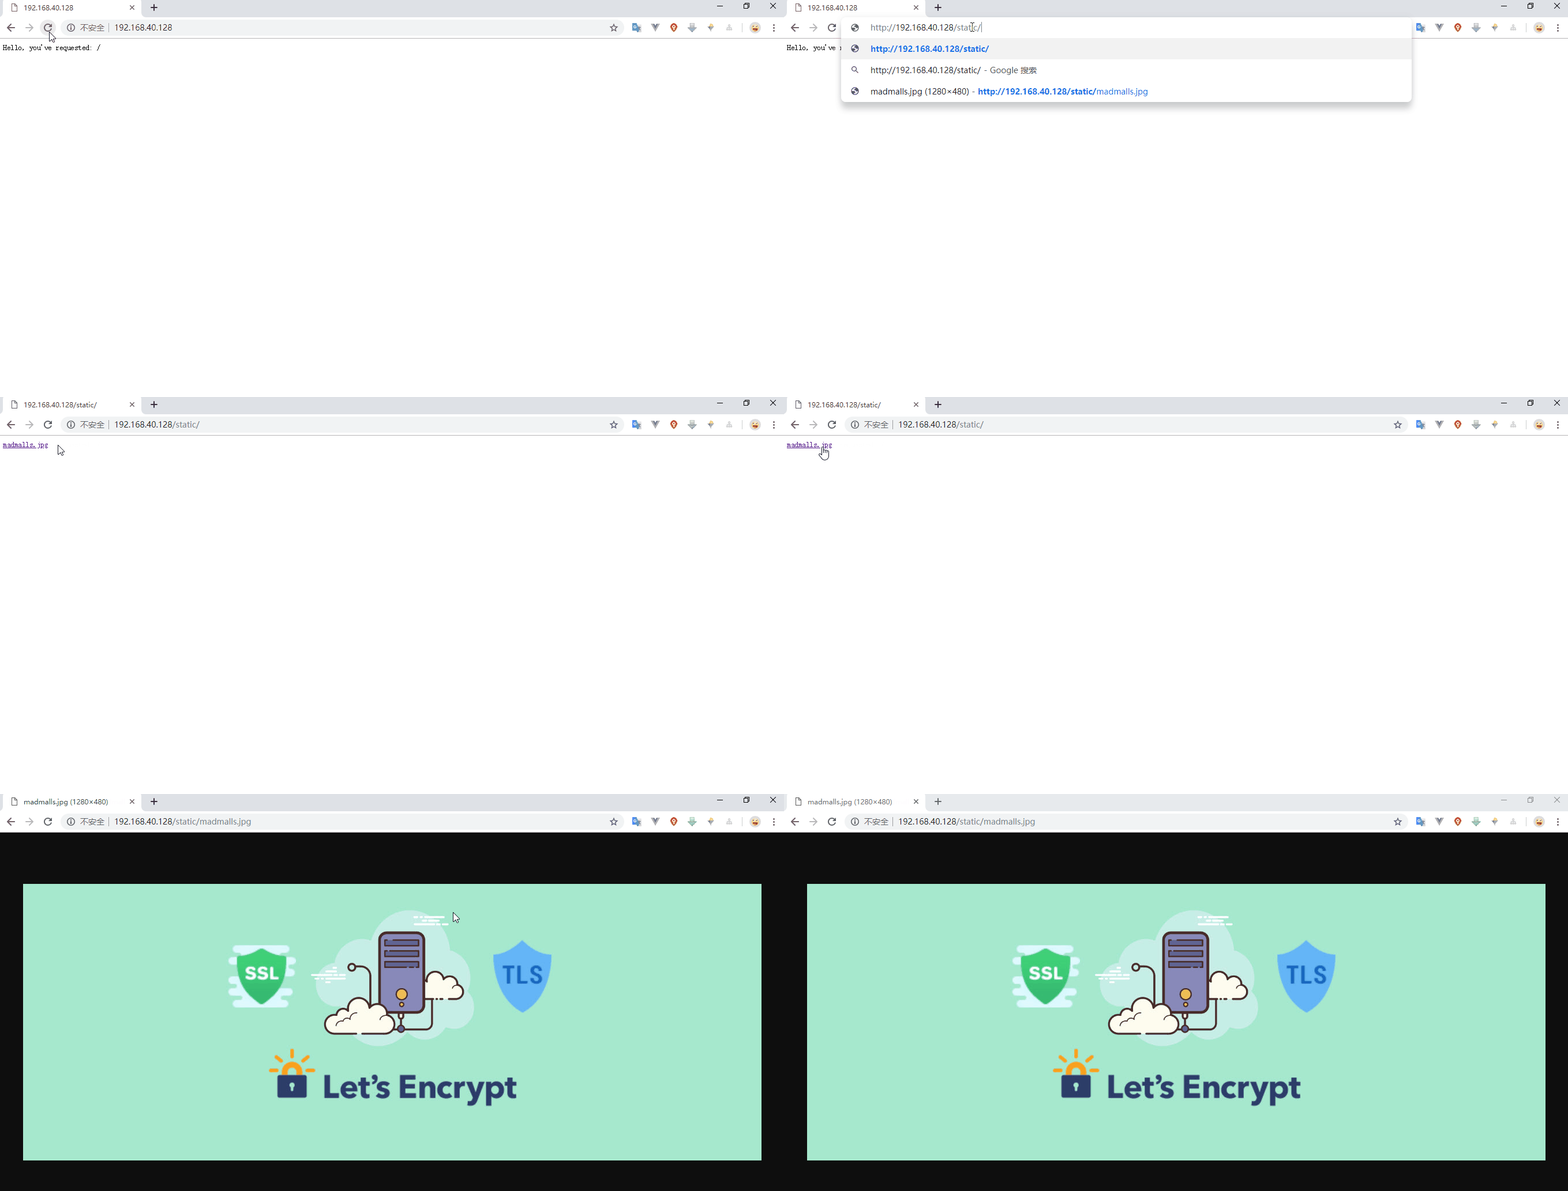
我的宿主机 IP 为 192.168.40.128,我们通过浏览器访问看看:

现在,要实现热更新了哦,修改 main.go 的内容,添加:
func main() {
    ...
    fs := http.FileServer(http.Dir("static/"))
    http.Handle("/static/", http.StripPrefix("/static/", fs))
    ...
}
一旦你保存文件,容器内的 reflex 就会帮你自动重新编译源代码,并重新启动应用。现在,我们创建新目录 go-docker-dev/go-example/static/,并复制一张图片 madmalls.jpg 到此目录下
然后,你再通过浏览器访问:

2. 如何快速使用
你只需要先安装 Dokcer 和 Docker Compose,并克隆我放在 Github 上的项目:
[root@CentOS ~]# git clone https://github.com/wangy8961/go-docker-dev.git
[root@CentOS ~]# cd go-docker-dev/
然后修改 docker-compose.yml 文件中内容即可,比如修改 ports 改变容器内映射到宿主机的端口号,修改 volumes 将宿主机上你的项目源代码目录映射到容器内的 /app 目录下(注意: 只能映射到 /app 目录,因为 build.sh 脚本只会到此目录来编译和运行应用),比如:
version: "3.7"
services:

  go-example:
    # building image from ./Dockerfile, and change network mode to 'host', because 'go get' need proxy in Dockerfile
    build:
      context: .
      network: host
    # specify the image name after builded
    image: go-docker-dev:latest
    ports:
      - "80:80"
    # go-example is your Golang project name,
    # don't change the target path '/app', because 'reflex' will go to there and then run 'go build .'
    volumes:
      - "$PWD/go-example:/app"
    # specify container name
    container_name: go-example
    # environment file
    env_file:
      - .env
此文件说明你的 Golang 源代码目录为 go-docker-dev/go-example 哦
如果你想指定编译选项或应用运行时的命令行参数,都可以修改 .env 文件的内容:
然后通过 Docker Compose 启动 Golang 开发环境的容器即可(注意: 假设你可以使用 127.0.0.1:1080 代理):
[root@CentOS go-docker-dev]# docker-compose up
Building go-example
Step 1/8 : FROM golang:1.12.5-stretch
 ---> 7ced090ee82e
Step 2/8 : ENV HTTP_PROXY='socks5://127.0.0.1:1080'
 ---> Running in c90a5c67b8a3
Removing intermediate container c90a5c67b8a3
 ---> b4a255b862a0
Step 3/8 : ENV HTTPS_PROXY='socks5://127.0.0.1:1080'
 ---> Running in e186621097a4
Removing intermediate container e186621097a4
 ---> c52fcc75f69c
Step 4/8 : RUN go get github.com/cespare/reflex
 ---> Running in 413f495624b7
Removing intermediate container 413f495624b7
 ---> ce99643777f7
Step 5/8 : COPY reflex.conf /usr/src
 ---> ba5af0210f69
Step 6/8 : COPY build.sh /usr/src
 ---> a13e467a9ffd
Step 7/8 : WORKDIR /app
 ---> Running in f372bcfd30f3
Removing intermediate container f372bcfd30f3
 ---> 6b50f6a9d219
Step 8/8 : ENTRYPOINT ["reflex", "-c", "/usr/src/reflex.conf"]
 ---> Running in ae580ee69746
Removing intermediate container ae580ee69746
 ---> 33efe4b5ac0f

Successfully built 33efe4b5ac0f
Successfully tagged go-docker-dev:latest
WARNING: Image for service go-example was built because it did not already exist. To rebuild this image you must use `docker-compose build` or `docker-compose up --bui
ld`.Creating go-example ... done
Attaching to go-example
go-example    | [00] Starting service
docker-compose up -d在后台运行各容器,Docker 的详细使用可参考: http://www.madmalls.com/blog/post/visualizing-docker-containers-and-images/


3 条评论
评论者的用户名
评论时间kenkk
2021-05-26T09:42:29Z大佬 全部的课程我想看 该怎么个流程 不想一个一个付费
Madman kenkk Author
2021-05-26T09:43:38Zhttps://madmalls.com/pay/buy-series-request/flask/ 一次性购买链接😏
millian
2024-09-10T17:51:44Z这里输入代码